JUnit

일반적으로 Spring 기반의 프로젝트에서 테스트를 다루게 된다면,
대부분의 경우에는 Junit 기반의 테스트를 작성하게 됩니다
그런데,
Junit을 사용할 때 주의할 점이 몇 가지 있는데요
우리가 무심코 알고 지내지 못했던 사실들에 대해서
공부해보자 합니다
Junit의 생명주기?
테스트가 실행될 때 우리는 이 생명주기가 어떻게 되는지 알아볼 필요성이 있습니다.
왜냐하면, Spring 통합테스트(=Integration Test)를 작성하다보면, 어쩔 수 없이 하나의 Context 로
여러개의 테스트를 실행하는 경우가 존재할 수 밖에 없기 때문이죠
물론 Spring Context 를 사용하지 않는 방향이 제일 좋은 방향성이지만,
보다 철저한 테스트를 위해서 Context 를 Load 할 수 밖에 없게 됩니다

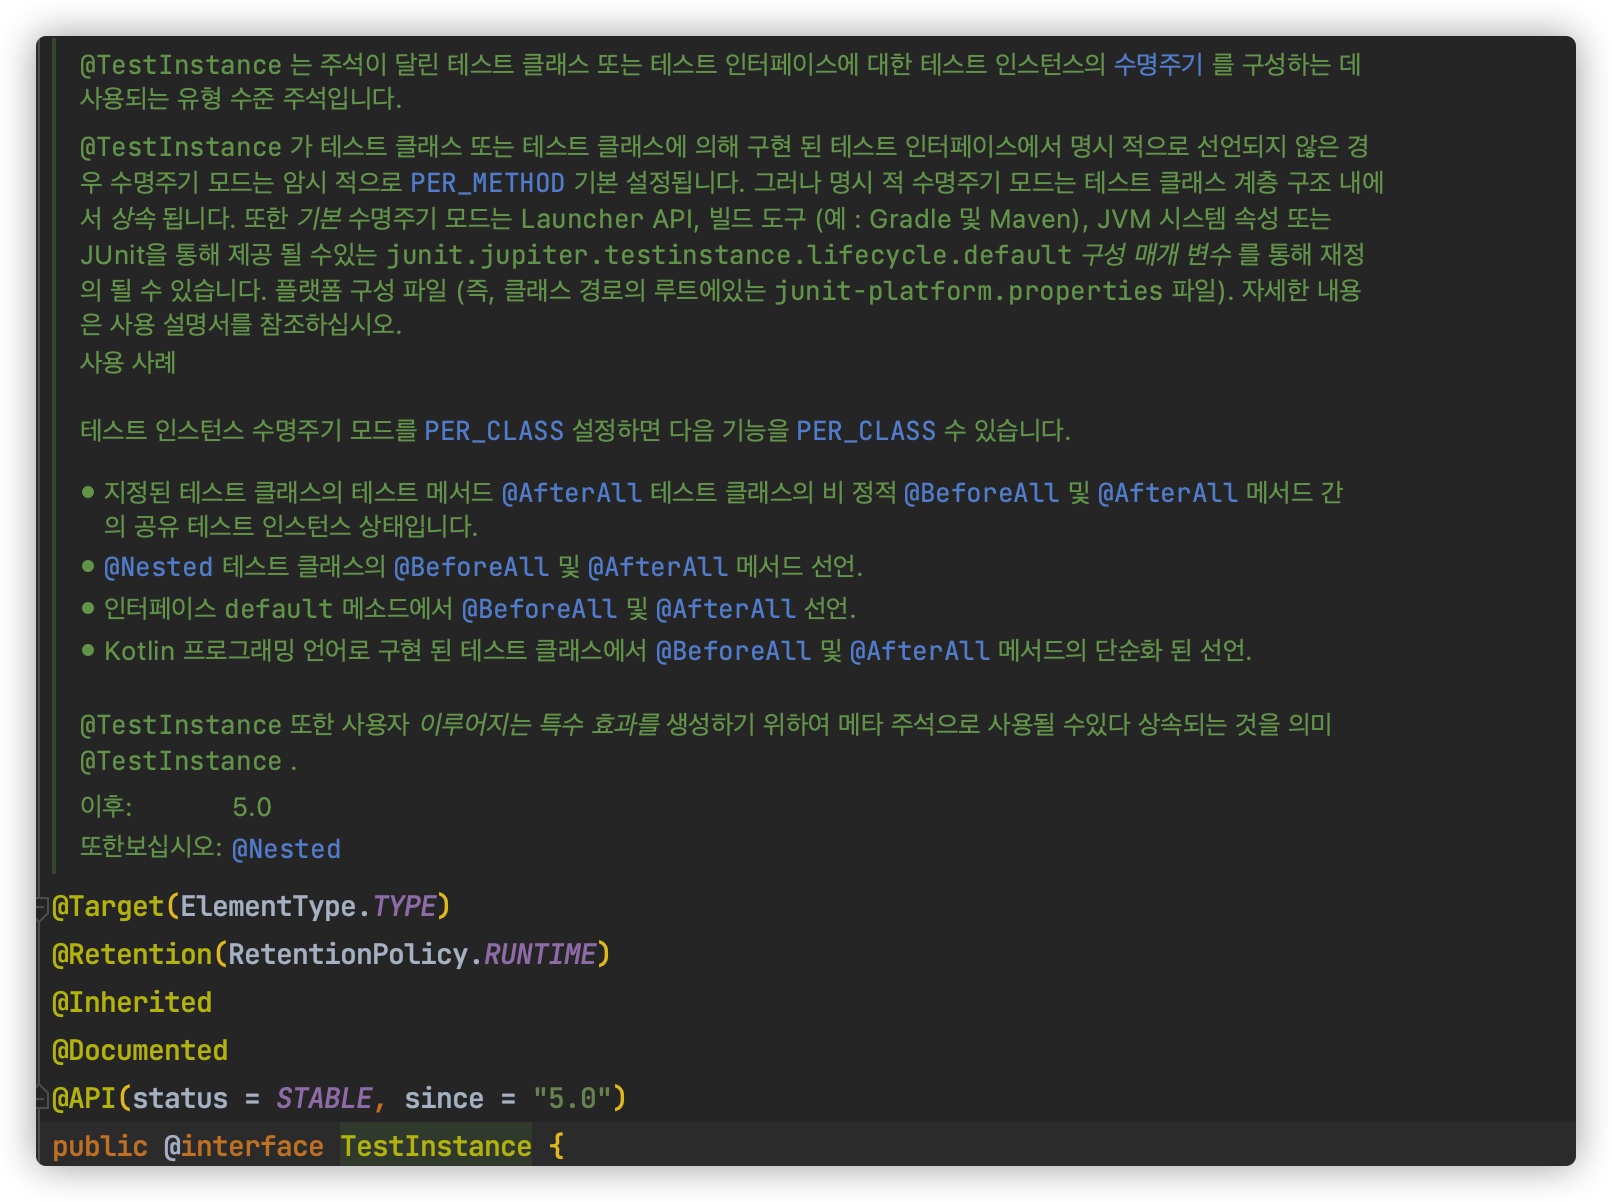
Junit5에서 제공하는 TestInstance 어노테이션인데요.
일반적으로 테스트의 생명주기는 Method 라고 설명하고 있습니다.
그러면 어떻게 해당 인스턴스 생명주기가 유지되는지 한번 살펴볼까요.?
우선 우리는 Test Instance의 생명주기를 Intercept 하는 Extension을 작성할 필요가 있습니다
package com.huisam.kotlinweb.lifecycle

import org.hibernate.annotations.common.util.impl.LoggerFactory.logger
import org.junit.jupiter.api.extension.ExtensionContext
import org.junit.jupiter.api.extension.InvocationInterceptor
import org.junit.jupiter.api.extension.ReflectiveInvocationContext
import java.lang.reflect.Constructor
import java.lang.reflect.Method
import kotlin.system.measureTimeMillis

class LifeCycleExtension : InvocationInterceptor {
    private val log = logger(this.javaClass)

    override fun <T : Any?> interceptTestClassConstructor(
        invocation: InvocationInterceptor.Invocation<T>?,
        invocationContext: ReflectiveInvocationContext<Constructor<T>>?,
        extensionContext: ExtensionContext?
    ): T {
        log.info("constructed, ${invocation?.javaClass}")
        return super.interceptTestClassConstructor(invocation, invocationContext, extensionContext)
    }
}Junit 에서 제공하는 InvocationInterceptor 인터페이스를 상속받아서,
클래스가 생성되는 지점에 대해 가로채는 클래스인데요.
간단하게 클래스가 생성되는 생성자 전에 바로 로그를 찍게 설정해보았습니다.
그 다음에 바로 테스트 코드를 작성해보았는데요.
@TestInstance(TestInstance.Lifecycle.PER_CLASS) // 생명주기는 클래스
@TestMethodOrder(OrderAnnotation::class) // 순서에 의해서 테스트 실행
@ExtendWith(LifeCycleExtension::class) // 커스텀 Extension Import
class ClassLifeCycleTest {

    private val count = AtomicLong(0L)

    @BeforeEach
    internal fun setUp() {
        count.getAndAdd(1) // 테스트 실행 전마다 +1
    }

    @Test
    @Order(1) // 처음 실행되는 테스트
    fun `자원 공유 테스트`() {
        assertThat(count).hasValue(1L)
    }
    @Test
    @Order(2) // 두번째에 실행되는 테스트
    fun `자원 공유 테스트2`() {
        assertThat(count).hasValue(2L)
    }
}간단한 테스트 코드입니다.
- LifeCycle은 클래스 단위로 설정
- 공유하는 자원을 설정
- 테스트에 순서를 매겨서, 순서대로 실행하게 설정
- 내가 생각한 값과 그대로 일치하는지 확인
해당 테스트 코드를 돌리면 어떻게 될까요.?

엥? 이게 정상이 아니냐구요?
그러면 한번 TestInstance 어노테이션을 제거한 테스트를 작성해보겠습니다
@TestMethodOrder(OrderAnnotation::class)
@ExtendWith(LifeCycleExtension::class)
class MethodLifeCycleTest {

    private val count = AtomicLong(0L)

    @BeforeEach
    internal fun setUp() {
        count.getAndAdd(1)
    }

    @Test
    @Order(1)
    fun `자원 공유 하지 않는 테스트`() {
        assertThat(count).hasValue(1L)
    }
    @Test
    @Order(2)
    fun `자원 공유 하지 않는 테스트2`() {
        assertThat(count).hasValue(1L)
    }
}제거를 하고 나서 테스트를 가동해보면.?
제가 생각하는 결과값은 위 테스트의 경우
Method 마다 LifeCycle이 별도로 구분되어 있으므로, 자원은 서로 공유하지 않게 됩니다.
따라서 count 값의 기대결과는 항상 1로 일치하게 되는 것이죠

짜잔 우리는 이렇게 해서 테스트 Life Cycle은 기본으로 method 마다 가져가는 것을 알 수 있었습니다
참고: junit.org/junit5/docs/5.3.0-M1/user-guide/index.html#writing-tests-test-instance-lifecycle
JUnit 5 User Guide
Although the JUnit Jupiter programming model and extension model will not support JUnit 4 features such as Rules and Runners natively, it is not expected that source code maintainers will need to update all of their existing tests, test extensions, and cus
junit.org
ExtendWith 커스텀 하기
테스트 LifeCycle을 이해했다면, 우리는 마음대로 커스텀한 Handler 를 작성할 수 있게 됩니다.
인터페이스 종류가 정말 많은데요
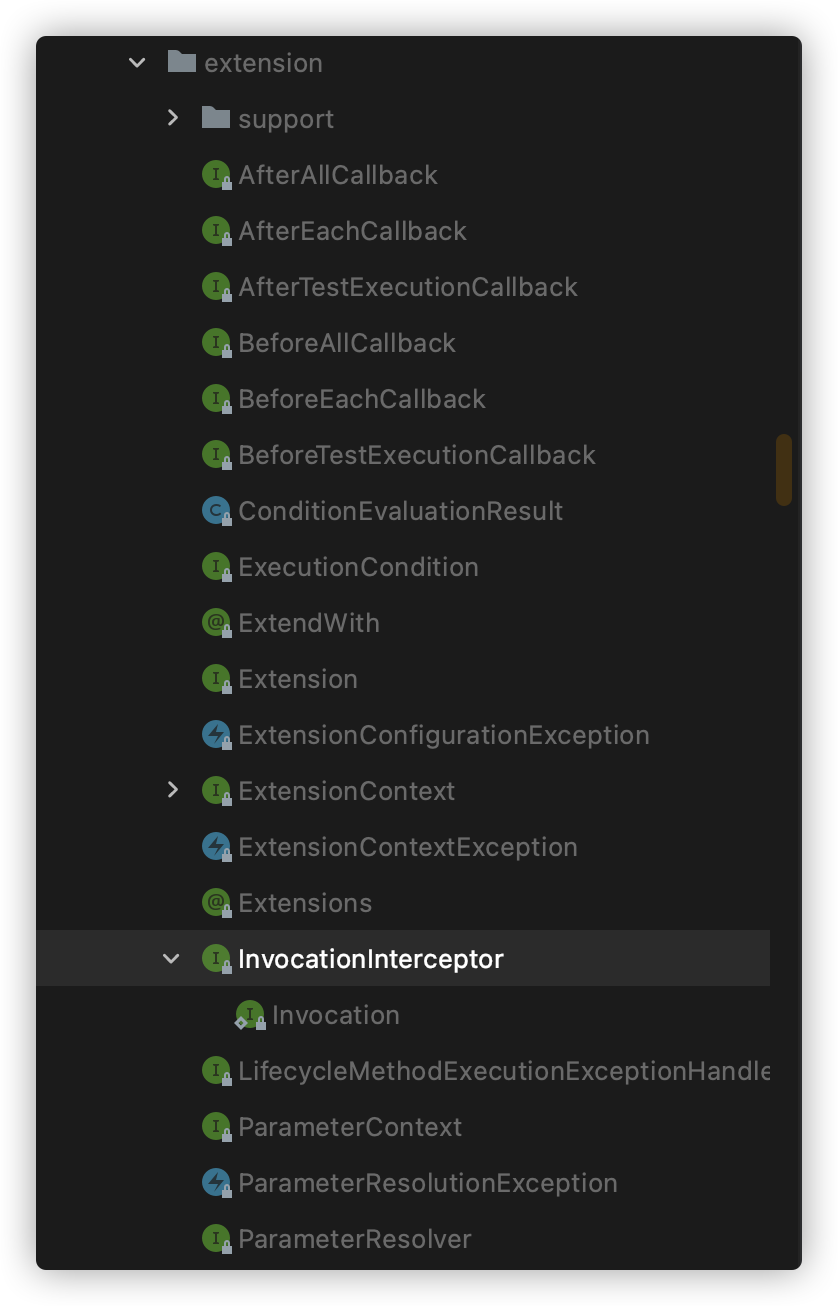
org.junit.jupiter.api.extension 에 해당하는 패키지로 들어가보면

정말 다양한 인터페이스들이 많습니다.
그 중에서 활용할 수 있는 인터페이스만 찾아본다면
- AfterEachCallBack: @AfterEach 어노테이션 메서드 실행 후
- AfterAllCallBack: @AfterAll 어노테이션 메서드 실행 후
- AfterTestExecutionCallBack: @Test 메서드 실행 후
- BeforeAllCallBack: @BeforeAll 어노테이션 메서드 실행 후
- BeforeEachCallBack: @BeforeEach 어노테이션 실행 후
- BeforTestExecutionCallBack: @Test 메서드 실행 전
- InvocationInterceptor: AOP와 유사하게 여러 메서드 실행 전후를 인터셉트하는 인터페이스
- TestInstancePostProcessor: 테스트 인스턴스가 생성된 후
- TestInstancePreDestroyCallBack: 테스트 인스턴스가 소멸 되기 전
정도로 정리할 수 있습니다.
그러면 간단하게 테스트 실행시간을 측정해보는 Extension을 작성해볼까요.?
아까 만들어 놓은 LifeCycleExtension에 시간 측정하는 기능을 추가해볼게요
    override fun interceptTestMethod(
        invocation: InvocationInterceptor.Invocation<Void>?,
        invocationContext: ReflectiveInvocationContext<Method>?,
        extensionContext: ExtensionContext?
    ) {
        val methodName = invocationContext?.executable?.name // 메서드명 가져오기
        val executionTime = measureTimeMillis { // 실행시간 측정
            super.interceptTestMethod(invocation, invocationContext, extensionContext)
        }
        println("테스트명 = $methodName, 실행시간 = $executionTime ms") // 결과 출력
}interceptTestMethod 라는 추상 메서드를 상속 받아서, 테스트명과 실행시간을 측정하는 메서드를 작성해보았습이다
위에서 작성된 테스트를 구동해보면.?

정상적으로 측정되는 것을 확인해볼 수 있습니다
제가 작성한 코드들은 여기서 확인해볼 수 있어요.!
huisam/kotlin-web
Contribute to huisam/kotlin-web development by creating an account on GitHub.
github.com
추가로 테스트 병렬실행에 대해 궁금한게 있으시면 Junit 자료를 더 찾아보셔도 좋을 것 같습니다
참고: junit.org/junit5/docs/5.3.0-M1/user-guide/index.html#writing-tests-parallel-execution
JUnit 5 User Guide
Although the JUnit Jupiter programming model and extension model will not support JUnit 4 features such as Rules and Runners natively, it is not expected that source code maintainers will need to update all of their existing tests, test extensions, and cus
junit.org
결론
그래서 오늘의 게시글을 요약해보면?
- 테스트 인스턴스의 생명주기는 기본이 Method 이다. Class 로도 수정할 수 있다
- 테스트 생명주기에 따라 커스텀한 여러 Extension을 작성할 수 있다
다음에는 Spring Context 과 같이 유지되는 테스트 생명주기에 대해 알아보도록 할게요 ^-^
'Developer > Spring' 카테고리의 다른 글
| Spring Batch란? - 기본 요소에 대해 알아보자 (0) | 2021.06.12 |
|---|---|
| Spring Boot Context Test - 스프링 컨텍스트 테스트 (aka. IntegrationTest) (0) | 2021.05.05 |
| Spring Cloud Feign Testing - Feign Client를 테스트해보자 (6) | 2021.04.11 |
| Spring Data JPA - 영속성 상태에 대해서 (2) | 2021.03.02 |
| Spring DI(Dependency Injection) & IoC Container - 의존성 주입이란? (0) | 2020.10.18 |
